The latest release of Agile Requirements Designer, version 3.2, now provides enhanced path custom fields. This new functionality extends the previous custom field capability, enabling you to dynamically aggregate values from multiple blocks and export a computed value on a path level.
ARD provides different functions, such as sum, average, min/max, and concatenation, and can automatically compute path-level values. The solution can then provide this path-level data and give you the flexibility to use it in a number of ways.
How ARD Path Custom Fields Works
Each block in an ARD model can have a block custom field set. This might be mapped to a field in an ALM tool, for example, a field that represents the state of a work item or user story. Alternatively, a field can indicate duration or complexity.
When paths are generated, each path can then calculate the value of all of the block custom fields in the path, depending on the function being used. This makes it very easy to understand specific information on a path level. You can export this value to a corresponding field in a software lifecycle management tool, use it as a variable in an automation snippet, or filter blocks in a model.
Setting the Custom Field Configuration
You can define custom fields in the General Config section of the Home ribbon:
In the Configuration dialog, you will see an item in the left-hand menu called Path Custom Fields. This is where you can create custom fields that are mapped to the model at a path level. These fields can use existing block fields or ARD attributes and apply them to a path. They can also be linked to integrated applications, such as Rally, Micro Focus ALM, Microsoft Team Foundation Server, or qTest, or to internal automation logic.

Create path custom fields in the ARD configuration dialog.
After entering the name in the Custom Field Name box, set the default value for the field. To use a function in your field value, click the edit icon with the red F.
The Custom Field Function dialog box displays a dropdown list of all of the available block custom fields as well as the functions available. You can set the default function for the path custom fields in the General Configuration dialog.
Using Functions in your Path Custom Fields
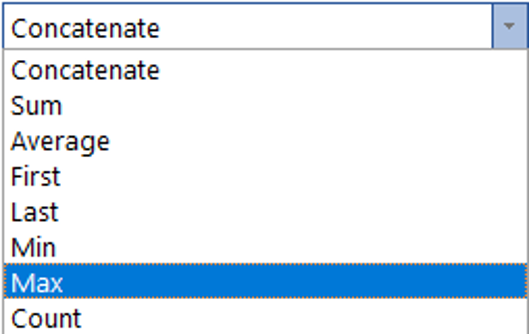
Perhaps you want to know what is the longest duration of a block in the path. To do this, use the Max function to return that information or the Min function to find the block with the shortest duration value. The Sum function adds all of the block custom field values in the path. The First and Last function provide the block custom field value of the first and last block of the path respectively. These are mathematical functions used to calculate such values as average or count.
Let’s say that different parts of your model apply to different application components and you want to associate blocks in the model with those components. You can create a custom field named TAG and enter the component name as the value. Then, use the Concatenate function to create a list of all the string values. This would identify all of the application components a particular path touches. For this function, you can select whether you want to include duplicates and you can also specify whether the separator is a comma or a new line.
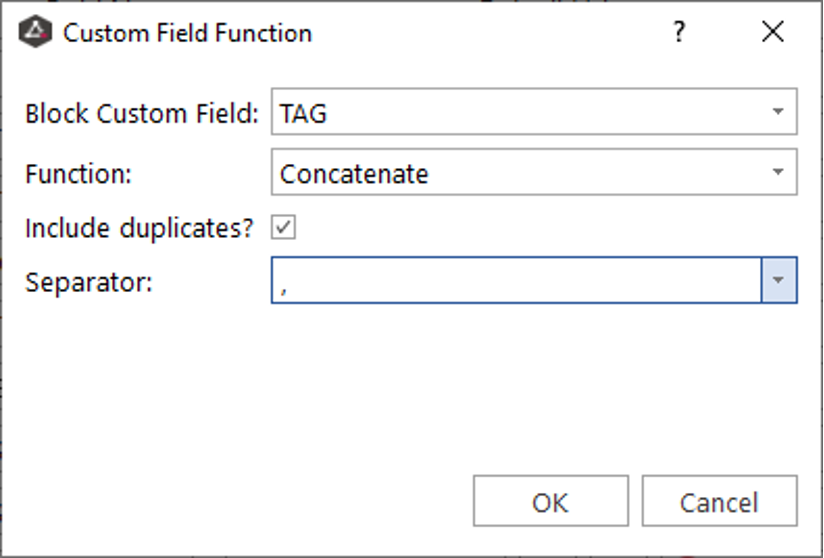
Create a Custom field named TAG and use the Concatenate function to create a list of string values.
See An Example of Path Custom Field Functions in Action
Let’s take a deeper look at how this works. Suppose you want to understand the amount of time a particular path takes to complete.
Create a custom block field named “duration” and set the default value to 5. This value represents the time it takes for the step defined in the block to be completed.
Now, each block in the path will be assigned a duration value of 5 by default. If you set the Path Custom Field type to be the sum of the Block durations, this would calculate the total amount of time a particular path should take to complete (5 times the number of blocks).
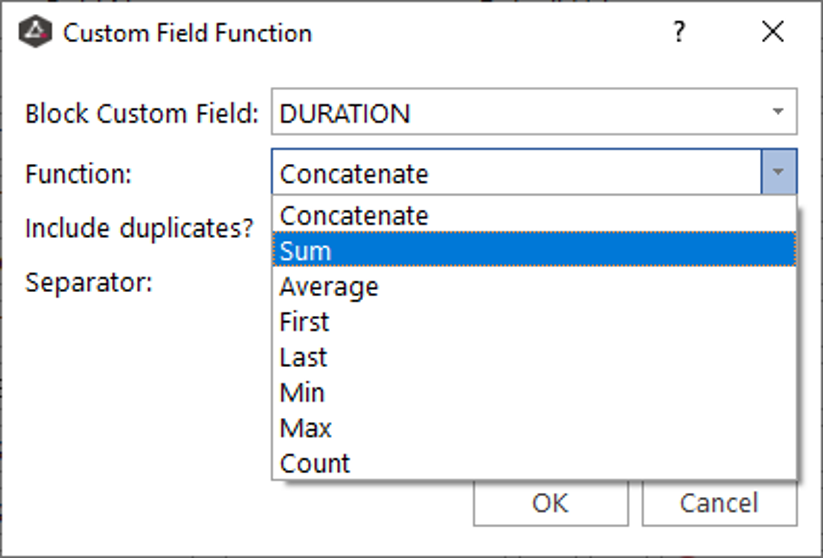
Create a Custom field named DURATION and use the Sum function to calculate the sum of the Block durations.
In the screenshot below, the block custom field duration has the default value set to 5.
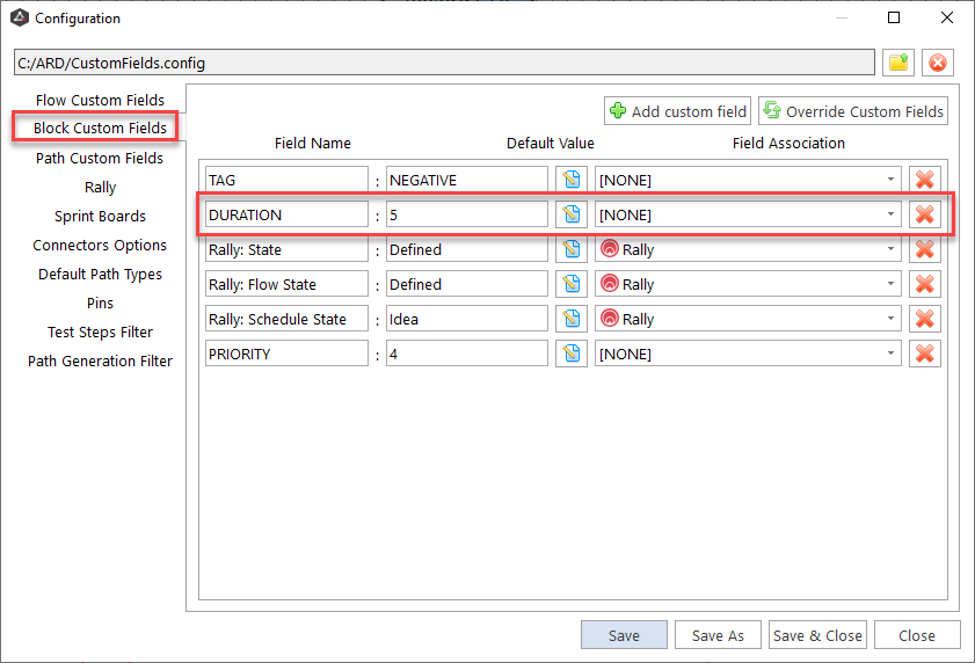
A block custom field duration set to a default value of 5.
In each block of your model, you can set the block field value directly in the properties to the appropriate duration for that particular block. This will override any default values from the configuration settings. In the screenshot below, the decision block has a duration set to 9, which overrides the default value of 5.
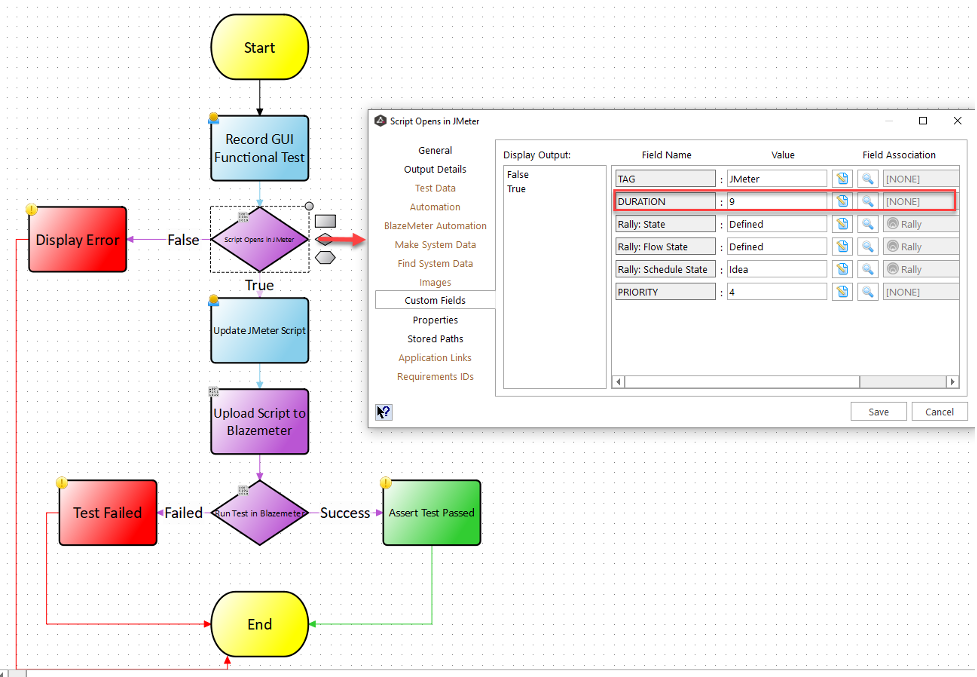
A decision block in Agile Requirements Designer set to a duration of 9.
View the path custom field values after generating the paths in Path explorer. After saving the paths, go to the Custom Field tab of the Details View dock. This dialog shows each of the path custom fields with their default functions or values. These functions or values can be overridden for a specific path, but will otherwise inherit the settings from the general configuration.
For the Duration field, the path custom field formula is set as the sum of the block duration custom field for the path. This means each block will have a default value of 5 except for the decision block, which we set to 9.
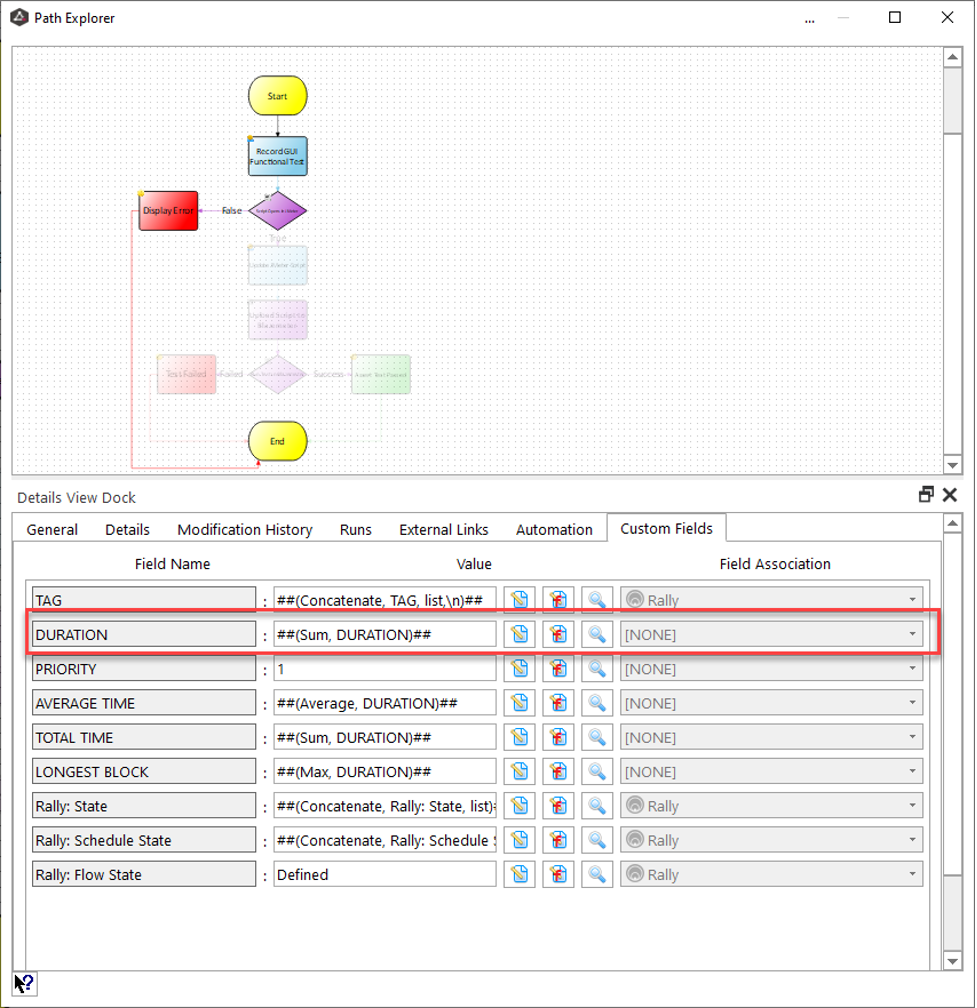
Access the Custom Fields in the Details View Dock in Agile Requirements Designer.
Clicking on the magnifying glass for the Duration field and the total value of the duration for the displayed path is 19, which is what we expected.
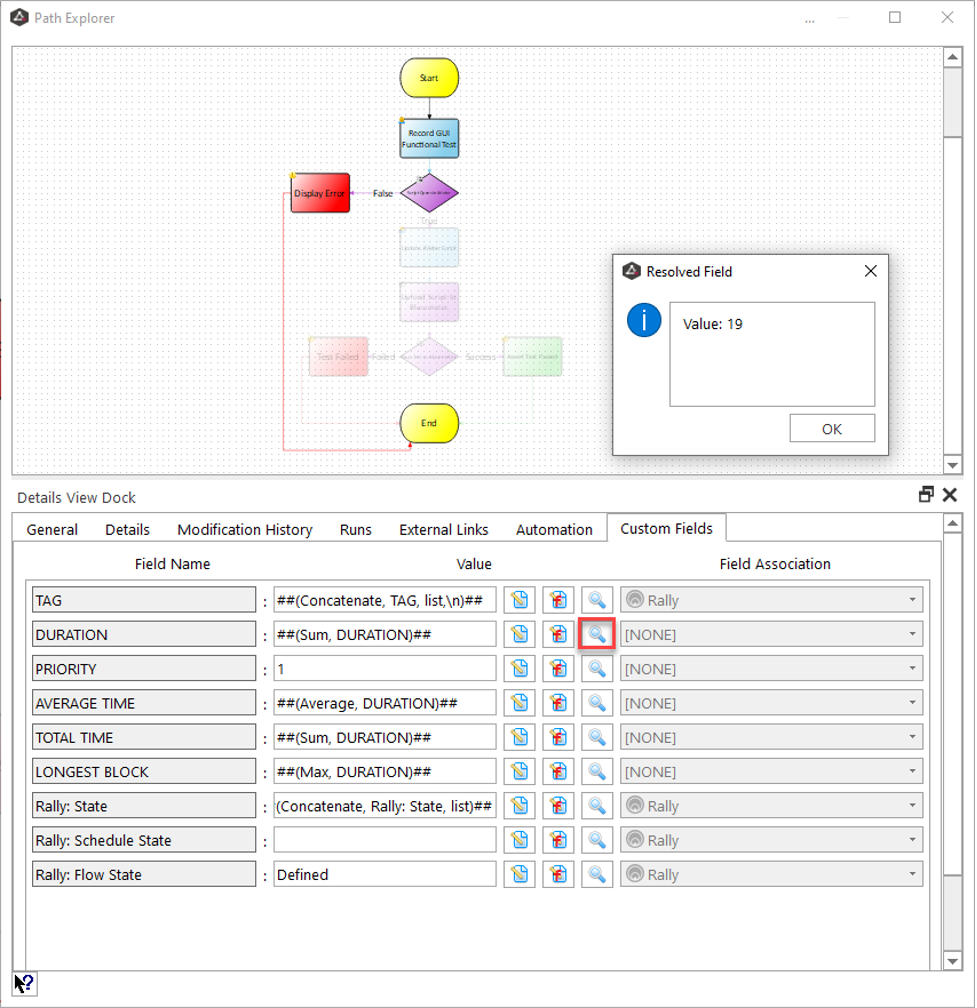
The magnifying glass icon reveals the total value of the duration for the path.
As pictured below, these values can be used in automation snippets. Alternatively, they can be exported to integrated software lifecycle systems as part of the test case data.
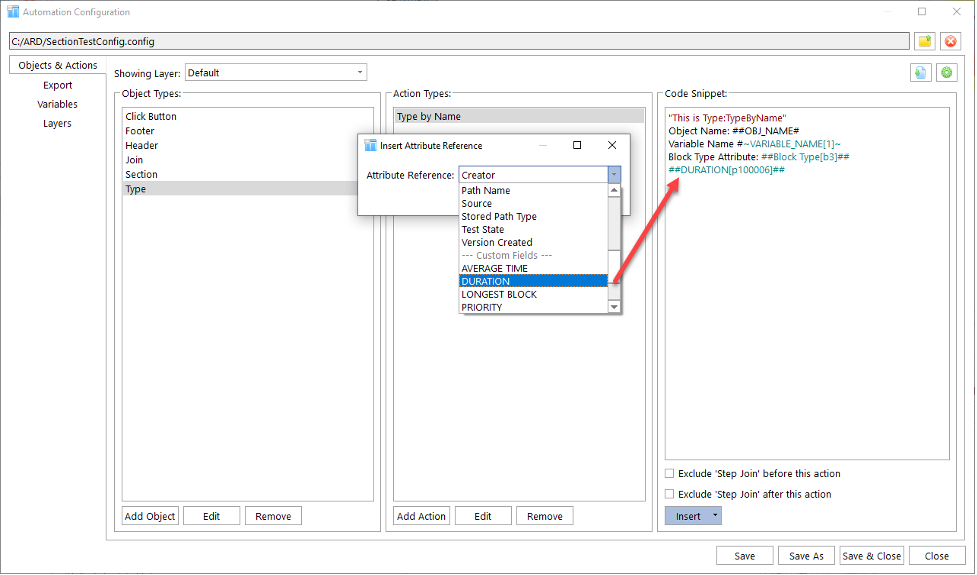
Custom field values can be used in automation snippets.
Using Custom Fields as Filters
Custom fields can also be used as filters for the model. You can use this to identify blocks in a model that meet certain criteria. All you need to do is set the filter type to block custom field. This will add an operation that includes all of the defined block custom fields. Then, select a field and set the value for that field. This will filter and show any blocks that have the value you designated.
In the screenshot below, we are filtering on the block custom field named TAG and using the contains operator to find any blocks that have a TAG custom field with the value “Chrome Recorder.” When the filter is applied, the Record GUI functional test block is highlighted, showing that it has a block custom field called TAG that has the value “Chrome Recorder,” which in this case is the name of the application that provides this functionality in our model.
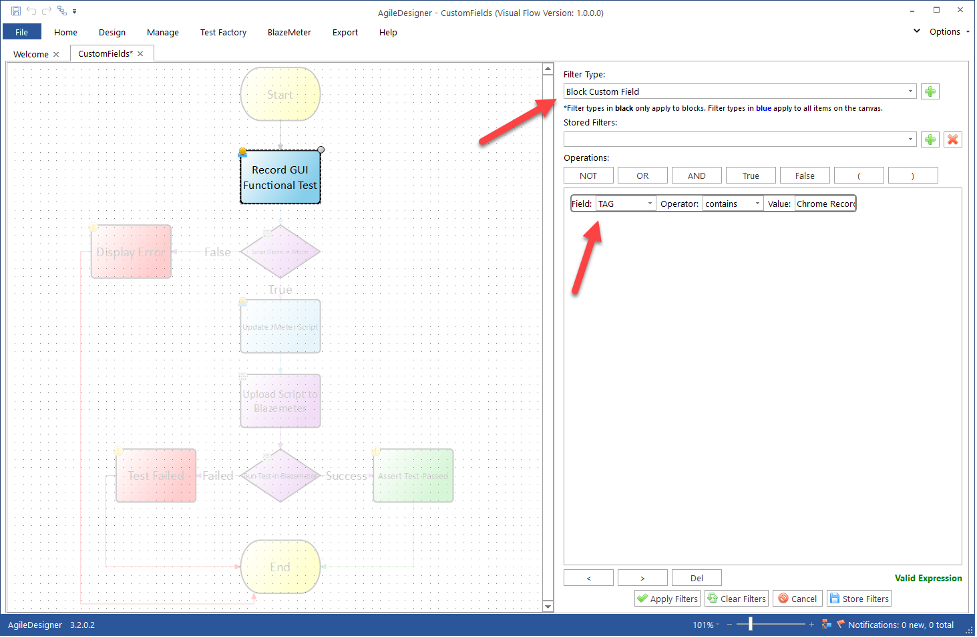
The Record GUI functional test block has a block custom field that has the value “Chrome Recorder."
Give Path Custom Fields a Try
As you can see, ARD path custom fields are a great way to enhance and track data on a path level. This feature is brand new to ARD 3.2 and is ready to use—with no additional configuration required. We are excited for you to try it.
For more information about using Path Custom Fields, please refer to the Define Custom Fields article. To learn more about what’s included in ARD 3.2 please visit our documentation portal.